This is a 3D printed emoji head that seats your phone on top and says whatever is playing on your phone. You can adjust its talking speed with a knob to match the tempo of whatever is playing.The knob is for the PWM speed controller.
I first looked for a mechanism that could turn the rotating motion of the motor into a cyclic back and forth motion that mimics the movement of human mouth. I found it on the 507 Mechanical Movements website. Then I 3D printed it out to see if the mechanism would work.
Testing just the mechanism
After know this mechanism could work, I printed the head. There were some problems. The first is the upper part of the mouth wasn't printed correctly. This seems to be from the 3D printer. So I later tweaked the way the two semi-spheres came together. Instead of having to screw them together, I opted for a simple snap on fit with two screws on the sides to secure them together. The second problem is that the slot on top of the head was too shallow so that the phone couldn't sit securely in it. Instead of making it deeper which I feared would encroach on the space for the gears inside, I opted to extend the wall of the slot upward and created this hair/crown looking appearance
1st version of the head
Final product
To make the mouth, I first printed out a quarter sphere with a diameter smaller than that of the head so it could fit inside it, it also has two holes on it for the screw to attach it to the moving parts inside.
Mouth
Inside the head
The motor and the moving parts sits on this backplate that I hotglued onto the inside wall. After putting everything on it, I just had to determine where to glue this backplate so nothing hits anything inside.
Backplate
Motor being mounted on the backplate
The motor shaft goes through a D-hole on the crank handle and secured by a set screw.
Crank handle
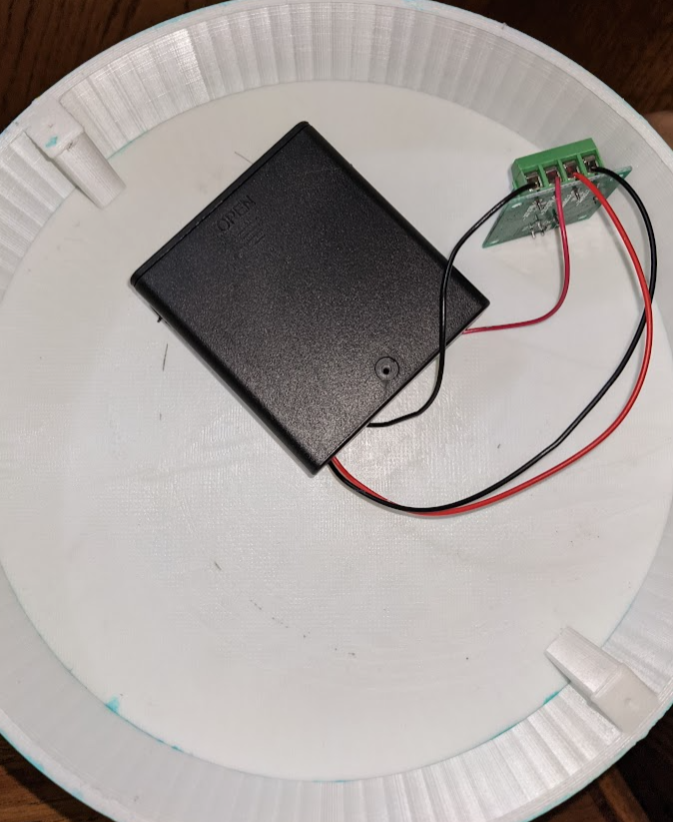
Finally, I tucked the batteries and the speed controller away underneath the base. The speed controller is a PWM, pulse width modulator, that adjusts the voltage going into the motor to vary its peed. I simply connected the ends of the batteries and the two ends of the motor to it.
Base with the batteries and PWM controller tucked away
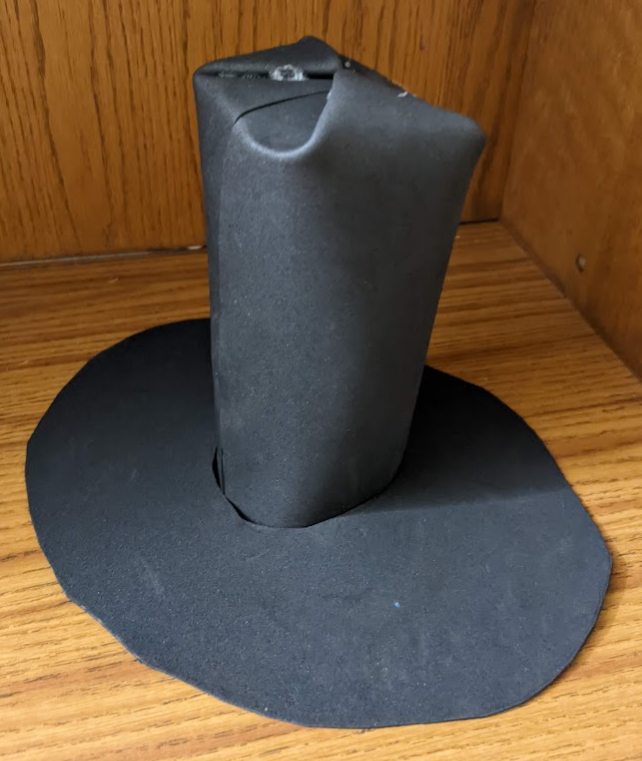
Lastly, I made the hat out of some foam paper, duct tape and glue glue. It is around Halloween and this wizard's hat complements the holiday festivity well.
That is it. Hopefully you enjoyed the project. Thank you for reading.
Project Statement I was talking about this project with my instructor and what surrealism meant. As defined in the project requirements, "t he original meaning of the found object must be transformed through the process of augmentation." I pointed to my water bottle and showed my instructor how I could turn the water bottle into a pen with the bottle part holding the ink, by screwing onto the bottle a 3D printed "pen nib." Here is my initial sketch. (Initial sketch) Process Then I went out and found a water bottle that looks most like a pen. Using the water bottle dimension, I defined the dimensions of the pen nib. (Defining the dimension of the 3D printed part) I tried printing several parts with different threads to find the right thread that can be screwed onto the bottle. I adjusted the diameter, pitch of the threads, etc. (3D models of bottle caps with different threads) (None of the threads fit the bottle correctly) But none would fit the bottle correctly. I ...
Project Description: For this project, we are to make an object that can do something, show some "emotion" so to speak, in response to our action. Here is what the official requirements are: At least one sensor At least one motor/servo At a minimum of 1 behavior Minimum size: 150 X 150 X 150 mm It must sense and move autonomously Brainstorming: At my disposal are the ultrasonic sensor and the servo motor provided to us in class. The shape of the ultrasonic sensor reminded me of nostrils. So I decided to make a face out of cardboard and poke two holes on it for the ultrasonic sensors. The idea is when I put a thumb-up in front of the face, it will turn from a sad face to a happy one. Making Process: My first step is to make the mechanism for the mouth. I took inspiration from mechanism #93 from the 507 mechanism movements website. The idea is to translate the motor's rotational motion into a linear motion. The mouth consists of 3 pieces of cardboard joined together by t...